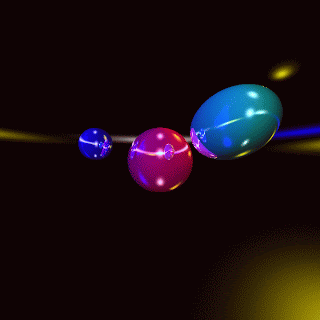
The final project for "Introduction to Graphics" was to make a ray tracer, a program that renders a 3D scene by tracing the path of rays of light as they strike objects, reflect off of them, and cast shadows.
The image you see above was not drawn using OpenGL or any graphics utilities; its colors were rendered from scratch, pixel by pixel, by mathematically tracing rays.
For the assignment, our programs were not allowed to know ahead of time what the scene would include. Instead, an input text file would tell it about factors such as how the virtual camera lens is shaped, where the lights are and how they're colored, where the spheres are and how they're stretched, how reflective they are, and how chalky and how shiny their materials are. Based on only that input text file, the program outputs the correct image data into a picture file.
As it happens, this is not the first ray tracer I've made (or else this project would have been as difficult as we were warned it would be); I also made one during high school, while attempting to make my own lifelike physics engine. Having not yet learned about more common ways to display 3D graphics, I made my own ray tracer to render it (and also discovered a few other well-known graphics concepts by accident). Soon I will dig up that engine and make a post about it on here, because it used a neat voxel subdivision approach that I'll be revisiting in the future.
As for this tracer, it was created in a two day timespan and used 350 lines of C++ code, almost all of which were related to file input/output or lighting calculations.
Above: Some pictures from early development (click for bigger). The colors indicate things like a point's normal direction, its reflection direction, or one of the assorted vector dot products that were needed.
Above: Some pictures used for testing (click for bigger).
Here is a more aesthetically pleasing scene I put together, shown with different levels of reflectiveness for the spheres:
Here are two animations using the previous set of images:
Animation 1 (Smooth)
Animation 2 (Slow sequence)


No comments:
Post a Comment